How To Change The Belt On A McLane Lawn Mower

McLane produces a variety of roller mowers driven by gasoline engines, including the 20-inch forward toss, which both amateurs and experts can use. McLane tractors are built to last and run smoothly and reliably using a chain motor and gear belt.
It’s essential to repair the clutch belt as it wears out to keep the machine running smoothly. After the clutch fails due to a cracked belt, the blades will keep spinning even though the motor is turned off.
Belts on McLane lawnmowers are prone to snapping or being ruined. Therefore, it has to be changed or replaced as quickly as possible to prevent accidents from occurring when mowing. Not a huge thing. However, if you have no idea how to replace the belt on the Tractor, this may appear daunting.
There is no longer any need for you to worry, however. Every word of this guide will be helpful to you whether you’re looking for information on the drive or brake belt. For this reason, let’s begin with the basics:
Easy Belt Replacement for Your McLane Lawn Mower
Replacing the belt on a McLane lawn mower may be tricky, as seen by the numerous times we’ve seen individuals make the same errors. We’ve written this post to explain why.
You’ll learn the quickest and most straightforward method for changing the belt on your tractor.
What we need to do first is replace the drive belt.
Take Off the Clutch Cover
The clutch cover must be removed from the McLane tractor before further maintenance can be done. A clutch shield for a tractor serves to shield the clutch chain from damage.
Cut the Clutch Cage Away!
Separating the clutch bar from the transmission requires first detaching the clutch guard. There are two different approaches to separating it. It may be done by either disassembling or removing a nut. Which approach you choose is entirely up to you.
However, this tension might be lost if the clutch lever is unscrewed. This is because there won’t be enough force on the crankshaft to make it rotate or not rotate. However, if you use this option, you’ll need to double-check that you put the screws back in the appropriate holes.
Removing the pin is significantly simpler than disassembling, as per professional personnel. First, the pin may be removed using a pair of catheter pliers. Then, simply disassemble your McLane tractor by pulling out the clutch shaft.
Cut Off That Outdated Belt
You’ll need a ½ inch flathead screwdriver to access the rear and undo the screws. After removing the spring, we can advance the clutch by pulling it forward. Take off your current belt and replace it with a new one.
Fasten Your New Belt
The McLane tractor is almost ready; we simply have to install the new clutch gear. However, you must be cautious since others pass this belt over the primary tire and afterward back underneath. This is a bad idea.
Remember that the clutch belt wraps around the hub and in front of the press lever when installing. The incorrect installation produces a confined space within the drive system. You won’t be able to get a nice, even mowing as a consequence.
To avoid any mishaps, please ensure that your brand-new clutch belt is properly fastened around the outside rim of the vehicle’s wheel. Next, put everything back together, including the clutch, the gearbox cover, the safety pin, and the mounting hooks.
Okay, that settles it; the discussion is over. Changing out the belt on requires no more than 5 to 10 minutes. Whatever the case, you must consult the owner’s handbook when you change the belt on your McLane tractor.
Instructions for Changing the Belt on a McLane Edger
This article will teach you how to remove and replace the crankshaft on a Mclane device, Edger. This is a really simple task. If you want to change your edger belt without making a mess, just adhere to these four easy steps:
On the other hand, if you are wondering about the belt length that a McLane edger uses, here is some information: The standard belt size for a McLane is 32 inches long and half an inch wide.
Ease off the McLane Edger buckle
To begin, you must pull the lever backward as far as it will go. Once you’ve done that, you may unhook the blade and unbuckle your pants. Assure you’ve loosened the McLane sharpener belt sufficiently before proceeding.
Make The Front Pulley Visible
Socket sizes typically range from 3/8 to 5/16 inches. To start, unscrew the front lid by pulling the 3/8-inch sockets and nuts. The use of a ratcheting wrench makes this task simple. Once that happens, the front sprocket will be uncovered.
Take Off Your Old Belt and Slip On Your New Belt
There is a bolt measuring 5/16 inches on the bottom. Let’s remove the nut and bolt. When that happens, the whole belt will be accessible to you. You should unbuckle the belt both in the front and behind.
Once you’ve succeeded in removing the old belt, install the replacement. Re-installation requires just the reversal of these steps.
Fix Your McLane Cutter Again
Following this, you may reconnect the sockets and start using your McLane edger once again without having to disassemble it. The sockets shouldn’t be too tightened. Tighten them up to prevent the lid from flying off.
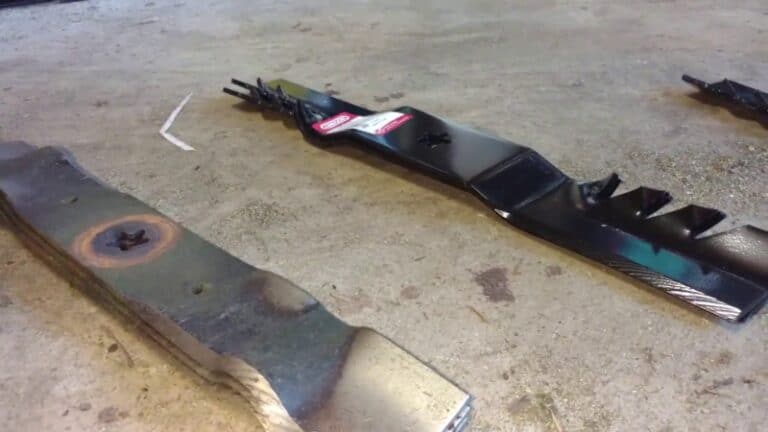
When Does a Riding Mower Belt Need to Be Replaced?
Here are several warning indications that your lawn mower belt needs replacing:
- Each and every component, including the tractor belt’s edges, must be perfectly uniform. Therefore, if the belt shows even the slightest sign of damage, it should be replaced right once to prevent it from snapping.
- If the belts that go around the pulleys seem like they’ve been burned or have a glossy or glazed finish, it’s time to get new ones.
- If the belt on your riding lawnmower shows signs of becoming rigid, such as tiny fractures, it is time to get a new belt.
Conclusion
Changing the McLane belt is something you should be familiar with by now. We’ve written this essay to make things easy enough for a newbie to follow along. If you’ve never changed the belt, do not get nervous. To proceed, just adhere to the given instructions.
You can also read: